Garlic Herb Chicken Recipe for Easy Weeknight Dinners
Getting dinner ready on a busy weeknight doesn’t have to be hard. This garlic herb chicken recipe brings restaurant-quality taste in just 30 to 45 minutes. You’ll make a tasty main dish with simple ingredients you likely have at home.
The secret to this dish is mixing fresh garlic, herbs, and butter into a tasty sauce. Your chicken comes out tender, juicy, and with crispy, golden skin. Plus, it’s easy to make without needing special skills.
This garlic butter chicken recipe works with bone-in thighs or boneless breasts. You can cook it on a sheet pan for easy cleanup or use a skillet for stovetop cooking. It’s perfect for both weeknight dinners and casual gatherings.
In this guide, you’ll learn how to pick the right chicken cut and master the garlic herb chicken technique. You’ll also find ways to make it your own and keep your meat juicy and tender every time.
Key Takeaways
- Garlic herb chicken cooks in under 30 to 45 minutes total
- Use pantry staples like butter, garlic, and fresh herbs for maximum flavor
- Bone-in thighs and boneless breasts both work equally well in this recipe
- A simple garlic butter sauce creates rich, restaurant-quality taste at home
- Sheet pan and skillet versions offer flexibility for easy cleanup
- Leftover chicken stores well and reheats beautifully for next-day meals
- Easy weeknight dinners become possible with this straightforward cooking method
Why Garlic Herb Chicken Is Perfect for Busy Weeknights
Garlic herb chicken is a top pick for families with tight schedules. It’s quick to make and tastes like it came from a fancy restaurant. This dish is perfect for busy nights because it’s easy to prepare yet full of flavor.
This recipe is simple and doesn’t require special skills. It lets you focus on other things while dinner cooks itself. You’ll see that great food doesn’t have to be complicated.
Quick Preparation in Under 30 Minutes
Getting ready for this dish takes only 5-10 minutes. You’ll season the chicken and chop garlic while the oven does the rest. The whole process takes 30-45 minutes, max.
This quick cooking time beats ordering takeout. You’ll have dinner ready before the delivery guy even shows up. Here’s how it goes:
- Prep and season your chicken (5-10 minutes)
- Sear in your skillet (5-7 minutes)
- Bake until cooked through (15-20 minutes)
- Rest and serve (2-3 minutes)
Budget-Friendly Ingredients You Already Have
You likely have all the ingredients for this recipe already. It uses common pantry items and fridge staples. Chicken thighs are affordable, and you probably have butter, garlic, and herbs at home.
This recipe helps you avoid expensive ingredients and fancy cuts. You don’t need to search for special items. Your pantry can make impressive meals without breaking the bank. It shows that you don’t need to spend a lot to have a great meal on a busy night.
“Quick, easy dinner recipes for busy families don’t need to be complicated—simple ingredients and straightforward steps create the best results.”
When choosing between easy beef pasta dinner options, garlic herb chicken is a smart choice. It offers restaurant-quality taste at grocery store prices with minimal effort.
Essential Ingredients for Flavorful Garlic Herb Chicken
Creating a tasty garlic herb chicken dish begins with the right chicken. You can choose bone-in, skin-on chicken thighs for juiciness and crispy skin. Or, go for boneless, skinless chicken breasts for a leaner, quicker-cooking option.
The key to this dish is the garlic butter sauce. Always use fresh garlic, not jarred. Mince it yourself for the best flavor. Unsalted butter lets you control the seasoning, avoiding too much salt.
Fresh herbs add a unique taste. Sage, thyme, and rosemary are the classic choices. They complement the garlic and butter perfectly. If you only have dried herbs, use less, about one-third of what’s called for.
Your pantry is also important:
- Extra virgin olive oil for searing your chicken
- Dry white wine for deglazing the pan
- Salt and black pepper for seasoning
- Low-sodium chicken stock as an alternative to wine
Knowing why each ingredient is crucial helps with substitutions. Whether you’re making a creamy pasta sauce or enjoying the chicken alone, these ingredients ensure a top-notch meal.
Choosing the Right Cut: Chicken Thighs vs Chicken Breasts
Choosing the right cut of chicken is key to a juicy dish. Chicken thighs and breasts have different cooking times and tastes. Your choice depends on what you’re aiming for in the kitchen.
Each cut affects cooking time, texture, and how well it holds up when rushed. Some prefer one over the other for nutrition or budget reasons. Let’s look at what makes each cut special.
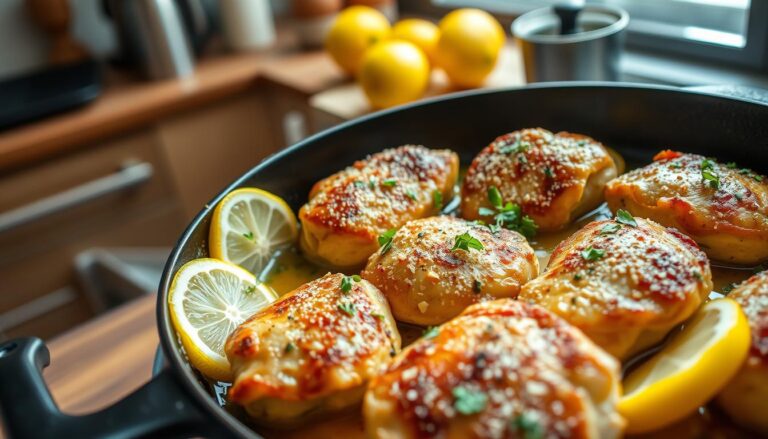
Benefits of Bone-In, Skin-On Chicken Thighs
Bone-in chicken thighs are perfect for this garlic herb recipe. The bones add flavor, making the dish richer. The thighs’ fat keeps the meat tender and juicy, even if it takes a bit longer to cook.
When seared, the skin gets crispy and golden, contrasting with the tender meat. This makes for a satisfying meal. The fat renders out, creating crispy, flavorful edges.
- Cook to an internal temperature of 185°F for maximum tenderness
- More budget-friendly than boneless chicken breasts
- Higher fat content makes them forgiving if slightly overcooked
- Perfect for comfort food pasta recipes when shredded for tossing with noodles
- Cook time ranges from 25 to 35 minutes depending on thickness
Making It Work with Boneless Chicken
Boneless chicken is great for those who prefer a leaner option. Both boneless, skinless chicken breasts and thighs work well. You’ll need to adjust your cooking slightly to avoid drying out the meat.
Boneless chicken needs more attention to prevent overcooking. Aim for an internal temperature of 165°F. If breasts are thick, cut them in half for even cooking and faster prep.
| Cut Type | Internal Temp | Cook Time | Best For |
|---|---|---|---|
| Bone-In, Skin-On Thighs | 185°F | 25-35 minutes | Maximum flavor and juiciness |
| Boneless, Skinless Breasts | 165°F | 15-25 minutes | Lean protein and quick meals |
| Boneless Thighs | 165°F | 20-30 minutes | Balance of flavor and leanness |
If you have boneless chicken, it’s fine to use it. This recipe is flexible for your kitchen and preferences. Many cooks choose boneless, skinless chicken breasts for quick, lean protein. Your juicy chicken recipe works well with any cut, making dinner easy and enjoyable every time.
The Magic of Fresh Herbs and Garlic Butter Sauce
The garlic butter sauce is the real hero of this dish. It turns simple chicken into something truly memorable. This sauce is more than just a topping; it bastes the chicken, adding layers of flavor to every bite.
Melted butter is the perfect vehicle for flavors. Unlike oils, it browns beautifully, creating rich tastes. Garlic and herbs dissolve into the butter, spreading their flavors evenly across the chicken.
Fresh herbs add a burst of flavor that dried herbs can’t match. Sage, thyme, rosemary, and oregano bring out vibrant, complex notes. Minced garlic in butter becomes mellow and sweet, unlike when it’s raw.
Making the herb butter is easy. Mix softened butter with salt, garlic, thyme, rosemary, oregano, and pepper. Whether you soften or melt the butter, the result is an aromatic sauce that keeps chicken juicy and flavorful.
- Softened butter blends smoothly with garlic and herbs
- Fresh herbs provide brighter taste than dried options
- The garlic butter sauce bastes chicken during cooking
- This combination creates delicious pan drippings
The pan drippings are like liquid gold for your creamy pasta with beef or other sides. They soak up all the flavors, making the sauce even more spectacular. You’ll want to pour this sauce over your chicken and sides for extra flavor.
Step-by-Step Instructions for Perfectly Cooked Garlic Herb Chicken
Learning the right cooking steps is key to making garlic herb chicken like a pro at home. This guide will show you how to cook it, from searing to oven roasting. You’ll get crispy skin and juicy meat that everyone will enjoy. It’s also great with creamy pasta dishes.
Searing for Golden, Crispy Skin
First, dry your chicken with paper towels. This helps it brown better. Heat olive oil in a cast iron skillet over medium-high until it shines.
Season the chicken well with salt and pepper on both sides. Put the pieces skin-side down in the hot oil. Don’t move them. Let them cook for 8 to 10 minutes for a golden crust.
When the skin is golden, flip the chicken and cook for just one more minute. Then, take them out and set them aside on a clean plate.
Creating the Aromatic Herb Butter
Lower the heat to medium. Add butter, minced garlic, and fresh herbs to the skillet. Cook for about 30 seconds until it smells great.
Pour in white wine or chicken stock. Use a spoon to get all the brown bits from the pan. Stir in the rest of the butter until it’s smooth.
Finishing in the Oven for Juicy Results
Put your chicken skin-side up in the skillet. Spoon the herb butter sauce over each piece. Bake at 350°F to 400°F for 20 to 25 minutes.
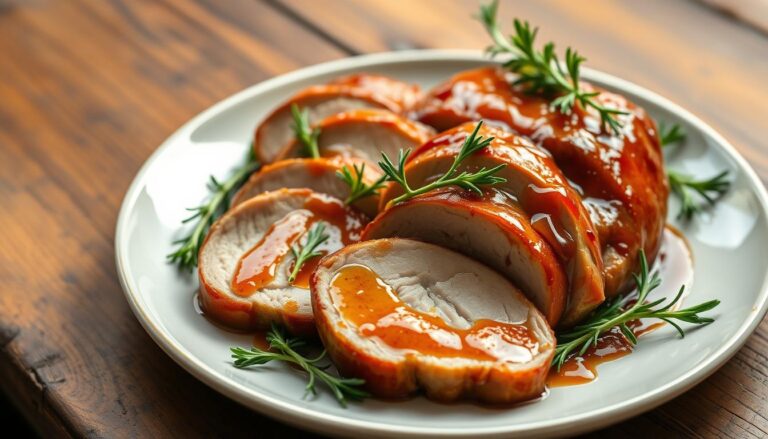
Halfway through, baste the chicken with sauce. Check if it’s done with a thermometer. Chicken breasts should be 165°F, thighs 185°F.
Take it out of the oven and let it rest for 5 to 10 minutes. This makes the meat stay moist and tender.
| Cooking Stage | Temperature | Time | What to Do |
|---|---|---|---|
| Searing | Medium-High Heat | 8-10 minutes skin-side down, 1 minute flipped | Create golden crust, remove from pan |
| Sauce Preparation | Medium Heat | 30 seconds herbs in butter | Add garlic and herbs, deglaze with wine or stock |
| Oven Roasting | 350-400°F | 20-25 minutes total, baste halfway | Return chicken skin-side up, check internal temperature |
| Resting | Room Temperature | 5-10 minutes | Let chicken sit undisturbed before serving |
These steps will make your garlic herb chicken perfect every time. It’s great with many sides and pasta dishes.
Pro Tips for Keeping Your Chicken Juicy and Tender
To cook chicken that’s moist and full of flavor, you need more than basic tips. It’s all about understanding how to keep it moist and using the right techniques. The key is to start before you even put the chicken in the pan.
First, take your chicken out of the fridge 15 to 20 minutes before cooking. Cold chicken can make the butter sauce seize up when it touches the meat. Chicken at room temperature cooks better and lets the sauce stick to it evenly. This small step can greatly improve your dish.
Before searing, pat your chicken dry with paper towels. Moisture on the surface leads to steam instead of a nice crust. A dry exterior is crucial for that golden crust you want.

- Preheat your skillet until it’s properly hot before adding the chicken
- Let the chicken sear undisturbed so the skin browns and naturally releases from the pan
- Resist checking or flipping until the skin achieves a deep golden color
- Finish cooking in the oven rather than on the stovetop for even heat distribution
- Cut thick chicken breasts in half horizontally for more uniform cooking
- Use an instant-read thermometer instead of relying on timing alone
- Rest the chicken for 5 to 10 minutes after cooking to allow juice reabsorption
- Spoon all pan drippings over finished chicken before serving
Finishing in the oven helps keep the chicken moist. It uses gentle heat all around, not just from below. This method stops the outside from getting too dry while keeping the inside juicy. Letting the chicken rest after cooking helps the juices spread evenly throughout.
Don’t swap olive oil for butter in this recipe. Butter is key for flavor and keeping the chicken moist. Every bit of pan sauce adds a richness that oils can’t match. This makes the dish much better than one pot beef pasta for a quick weeknight meal.
Wine vs Chicken Stock: What Works Best for Deglazing
Deglazing techniques make your pan a flavor powerhouse. After searing your chicken, you’re left with browned bits. These bits are full of flavor. Adding liquid to the hot pan lifts these bits, creating a rich sauce.
You can use dry white wine or chicken stock for deglazing. Both methods work well. Your choice depends on what you have at home and your taste preferences.
How Dry White Wine Enhances Flavor
White wine cooking adds brightness and depth to your garlic herb chicken. Pouring about three-quarters cup of quality dry white wine into your hot pan starts bubbling and steaming. This action lifts all those flavorful browned bits from the pan’s surface.
The wine reduces slightly, and its alcohol cooks off within minutes. This leaves behind complex flavors. Wine adds subtle acidity that balances rich butter and herbs. This prevents your sauce from tasting heavy or one-dimensional.
Use a wooden spoon to scrape the pan’s bottom while the wine bubbles. This ensures every flavorful bit gets incorporated into your sauce. The process takes just a few minutes and creates a restaurant-quality result.
Choosing a Chicken Stock Alternative
Low-sodium chicken stock is a milder option for those avoiding alcohol. It creates a delicious sauce with savory depth and body. Stock produces a traditional comfort-food flavor that works beautifully with garlic and herbs.
Use the same amount of stock as you would wine—about three-quarters cup. The cooking technique stays identical. Scrape the pan bottom while the stock simmers and reduces slightly. Your sauce develops richness without the acidity wine provides.
Want balanced flavor? Mix half wine and half stock. This combination captures the brightness of wine with the savory comfort of stock. You get the best of both approaches in a single pan.
| Deglazing Liquid | Flavor Profile | Best For | Amount |
|---|---|---|---|
| Dry White Wine | Bright, acidic, complex | Rich, balanced sauces | ¾ cup |
| Low-Sodium Chicken Stock | Savory, mild, comforting | Traditional flavor profiles | ¾ cup |
| Half Wine, Half Stock | Balanced, layered flavors | Versatile cooking | ¾ cup total |
Deglazing techniques aren’t complicated. They’re essential steps that transform simple pan drippings into restaurant-quality sauces. Whether you choose wine, stock, or a combination, you’re adding serious flavor enhancement to your dish. The choice is yours based on your pantry and taste preferences.
Simple Ingredient Swaps and Recipe Variations
You can easily change your garlic herb chicken recipe to fit what you have in your kitchen or your taste. Making ingredient swaps means you can still cook this dish even if you’re missing something. Recipe changes let you make the basic recipe into something new while keeping it delicious.
Protein and Butter Swaps
You don’t have to use bone-in, skin-on chicken thighs. Boneless chicken thighs cook faster and need less prep. Chicken breasts are also good, but you’ll need to cook them 5-10 minutes less. Bone-in chicken legs or drumsticks are a budget-friendly choice that tastes great.
For butter, unsalted is best, but salted works if you add less salt. Ghee adds a rich, nutty flavor. Mixing butter with olive oil makes the dish creamy and less fatty, like a creamy beef pasta recipe.
Herb and Flavor Adjustments
Fresh herbs are great, but dried herbs can replace them well. Use one-third the amount of dried herbs since they’re stronger. Try dried sage, thyme, and rosemary for different tastes. You can also add oregano, marjoram, or tarragon for more flavors.
Adding extra seasonings makes the recipe exciting. Smoked paprika adds depth, and red pepper flakes add heat. Lemon zest brightens it, and heavy cream adds richness, like a creamy beef pasta recipe. These changes change the flavor without changing how you cook it.
| Original Ingredient | Substitution Option | Amount Adjustment | Flavor Impact |
|---|---|---|---|
| Unsalted Butter | Salted Butter | Same amount, reduce added salt | Slightly saltier base |
| Unsalted Butter | Ghee | Same amount | Nutty, clarified butter flavor |
| Unsalted Butter | Butter and Olive Oil Mix | Half butter, half oil | Lighter, less saturated fat |
| Fresh Thyme (1 tablespoon) | Dried Thyme | 1 teaspoon | Same herbaceous flavor |
| Fresh Sage (1 tablespoon) | Dried Sage | 1 teaspoon | Same aromatic quality |
| Fresh Rosemary (1 tablespoon) | Dried Rosemary | 1 teaspoon | Same piney flavor |
| Chicken Thighs | Boneless Chicken Thighs | Same weight | Quicker cooking time |
| Chicken Thighs | Chicken Breasts | Same weight, reduce time 5-10 min | Leaner meat |
Vegetable Additions and One-Pan Meals
Adding vegetables to your pan makes a complete meal. Halved baby potatoes, pearl onions, and green beans cook well with the chicken. These changes make dinner a one-pan meal that’s easy to clean up.
Cooking Method Modifications
You can use different cooking methods with recipe changes. For slow cooker, sear the chicken first, then cook on low for 4-5 hours. An Instant Pot is great too—sear first, then pressure cook for 15 minutes. These changes are perfect when your schedule changes.
- Dairy-free versions use olive oil or dairy-free butter alternatives instead of traditional butter
- Low-carb adaptations skip starches and serve with cauliflower rice or zucchini noodles
- Extra vegetables turn the dish into a hearty, filling meal
- Spice additions like paprika or cayenne pepper customize heat levels
- Parmesan cheese sprinkled on top adds savory richness
These ingredient swaps and recipe changes make garlic herb chicken fit any diet, kitchen, or taste. You’re never stuck with just one recipe when you know these swaps and changes.
Best Side Dishes to Serve with Garlic Herb Chicken
Your garlic herb chicken needs sides that highlight its flavors. The right sides can turn a simple meal into something special. You can choose creamy comfort foods or fresh vegetable sides to balance the meal.
This dish is very versatile. Whether you prefer rich comfort foods or light vegetable sides, you can find the perfect match. Let’s look at both options to help you create a great meal.
Creamy Comfort Foods That Pair Perfectly
Creamy sides are perfect with garlic herb chicken. Mashed potatoes, especially those with cream cheese or garlic, soak up the sauce. They become the main attraction, filled with garlic butter flavors.
Here are some comfort food pairings for your chicken dinner:
- Creamy mashed potatoes or garlic mashed cauliflower
- Goat cheese polenta with its tangy, smooth texture
- Goat cheese risotto for a sophisticated touch
- Buttered egg noodles or fettuccine
- Creamy potato gratins with herbs
Pasta is great as a side when you want something hearty. Simple buttered noodles or creamy pasta dishes complement the garlic butter sauce. It’s like having savory beef noodles, where the sauce clings to every strand, offering comfort.

Light and Healthy Vegetable Options
Balance the meal with fresh vegetable sides. Roasted vegetables add color, nutrition, and texture without overpowering the chicken’s herbs.
Here are some vegetable sides options:
- Parmesan Brussels sprouts with crispy edges
- Maple roasted carrots for subtle sweetness
- Roasted broccoli or broccolini with slight char
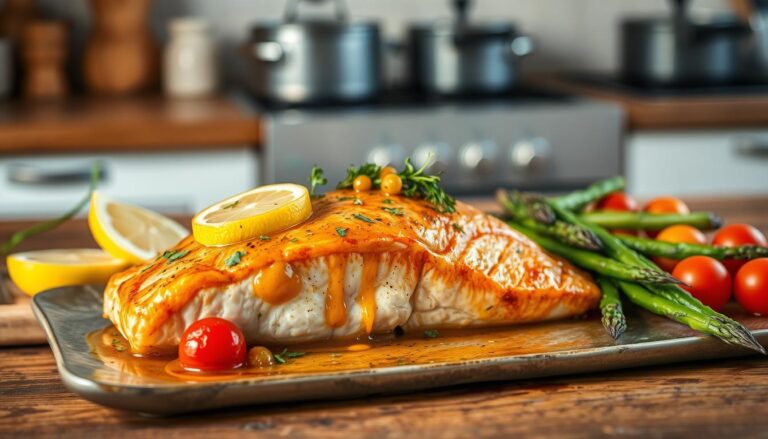
- Asparagus roasted with garlic and lemon
- Mixed green salad with vinaigrette dressing
- Riced or roasted cauliflower for low-carb options
Green salads with vinaigrette are excellent sides. The acidity cuts through the butter sauce, refreshing your palate. You can also serve crusty artisan bread or garlic bread for sopping up sauce.
Roasted vegetables alongside your chicken make complete sheet-pan meals. This makes dinner easier and tastes like it’s from a restaurant.
Sheet Pan and One-Skillet Variations for Easy Cleanup
Turn your garlic herb chicken into a sheet pan dinner for quick cleanup. A simple sheet pan dinner means everything cooks on one pan. Place seasoned chicken and veggies like baby potatoes, green beans, or Brussels sprouts on a baking sheet.
Drizzle them with garlic herb butter. Roast at 400°F until the chicken hits 185°F. This way, you get a delicious meal with minimal effort.
This one-pan chicken dinner is all about simplicity. Your veggies soak up the chicken’s flavorful drippings as they cook. Shake the pan and stir the potatoes to get even browning.
When it’s all done, you only have one pan to clean. No need for multiple dishes.
Keys to Sheet Pan Success
For the best sheet pan dinner, pay attention to spacing and sizing. Here are some tips:
- Make sure chicken pieces have enough space for browning
- Cut veggies to similar sizes for even cooking
- Stir or shake the pan halfway through cooking
- Use dark metal pans only if you reduce oven temperature by 25°F
One-Skillet Meal Benefits
A one-skillet meal brings amazing flavor. Sear chicken in a cast iron or oven-safe skillet on the stovetop. Make your herb butter sauce in the same pan, using the browned bits for flavor.
Finish cooking in the oven without moving to another pan. This method adds depth to your meal while keeping cleanup easy.
Cast iron skillets are great for this because they go from stovetop to oven without a hitch. Any oven-safe skillet works well. This method is perfect for small households, needing no big roasting pans.
Storing and Reheating Leftover Garlic Herb Chicken
After enjoying your garlic herb chicken dinner, you’ll want to keep those flavors for later. Proper storage keeps your dish fresh and safe for days. Learning how to store food well helps you enjoy your meals more and saves time.
Refrigerator Storage Guidelines
Let your garlic herb chicken cool down before storing. Don’t leave it out for more than two hours. Then, put it in an airtight glass container to keep flavors and prevent odors.
Your chicken will stay fresh in the fridge for three to four days. Store it with its pan sauce to keep it moist. If you prefer, remove the meat from bones for quicker reheating.
For meal prep, divide the chicken into separate containers. This way, you can grab only what you need. Always label containers with today’s date to keep track of freshness.
You can also freeze your chicken for up to three months. Shred or slice it before freezing to thaw only what you need. Use containers that are safe for the freezer and press out air to avoid freezer burn.
- Cool chicken completely before storing
- Use glass airtight containers for best results
- Keep chicken with its flavorful sauce
- Label containers with storage dates
- Store in portion-sized containers for convenience
- Freeze for up to three months for extended storage
When reheating chicken, the microwave is quick. Place it in a microwave-safe container and cover with a damp paper towel. Heat in thirty-second intervals until it reaches 165 degrees Fahrenheit. For better texture, use your oven instead. Arrange chicken in a dish, cover with foil, and reheat at 350 degrees for fifteen to twenty minutes. Add butter or chicken stock to refresh the sauce.
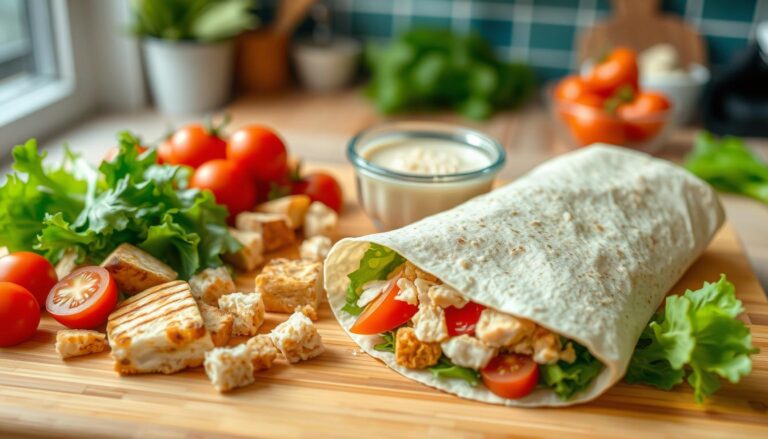
Leftover garlic herb chicken is great in many dishes. Slice it for sandwiches, chop for salads, shred for tacos, or dice for pasta bowls. These ideas help you use up all the chicken and keep your meals interesting all week.
Conclusion
The garlic herb chicken recipe is perfect for a quick weeknight dinner. It’s ready in under 30 to 45 minutes. You only need simple ingredients you probably have at home.
This recipe is great for families because it’s easy to make. You can use different chicken cuts, like thighs or breasts. It’s also easy to clean up because you can cook it in one pan.
You can make it your own by trying different herbs and adding veggies. It goes well with creamy sides or healthy veggies. Leftovers can be used for new meals.
Once you make this chicken at home, it will be a hit with your family. It’s easy, affordable, and tastes great. So, go ahead and make it tonight.